I tried 5 tricks to keep our home dust-free during our house renovation – this $10 method worked perfectly
By Amy Reeves,
20 hours ago
As anyone embarking on a renovation project – big or small – will know, dust is your enemy. Even the smallest job can kick up all sorts of debris that will settle anywhere and everywhere.
I’m currently in the midst of our second renovation, which at the moment includes the roof being replaced and multiple walls being taken down. We’ve tried everything we can to keep dust travel to a minimum, so I’ve gathered the tricks that worked best for us – including a $10 method that was incredible value for money.
Learn from our experience and make your house renovation as fuss-free as possible.
Why should you keep dust to a minimum during a renovation?
Not only is dust unhygienic in your living areas, it can also cause, or exacerbate health issues. I have asthma so we really need to be on top of removing dust or contaminants from our work surfaces and living areas.
What’s more, keeping a clean and tidy environment on site while construction workers are milling around sets the tone for an organized project. Starting off with these tips and tricks will save you hassle down the line.
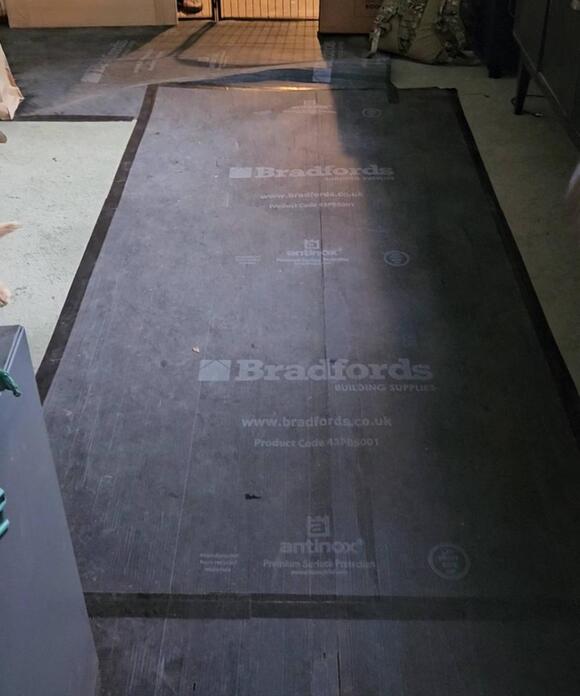
Although the green carpet won't be in the house much longer, putting floor protection boards down stop dust particles becoming embedded and later reintroduced into the air. (Image credit: Amy Reeves)
First things first, if you have a carpeted floor near the renovation area, minimize long-lasting dust by using protection boards. Carpets love to breathe in any air pollutant and hold onto them for years, so nip this issue in the bud from the start.
The carpets in our house are to be ripped up during the next phase of our renovation, so while we weren’t bothered about their longevity, the protection boards have been secured using duct tape and provide easy access though the house that is easy to mop up at the end of the day.
2. Put up dust screens to isolate the renovation area
My bathroom had to be protected from the plaster dust so I put up dust sheets to add a second barrier of protection. (Image credit: Amy Reeves)
This one is my most recommended point of action while living on site during a renovation . Use layers of plastic sheeting to screen off different parts of the house.
If you’re living in the house while the renovation is ongoing, they’re an absolute godsend. Some niftier products can come with zip-up or magnetic doors, or even metal poles to create rooms within rooms.
Because we are forever on budget, however, I used a standard roll, available for just $10, overlapping each sheet and creating a barrier. It worked perfectly and our kitchen and living areas were clean and dust-free for the duration of the demolition of walls.
This is really similar to the roll of plain plastic sheeting we used, except it also comes with dust taping included for an optimal seal to prevent airborne contamination. It's waterproof, too.
This practical dust sheet features a magnetic lining in within the blue piping so the opening can be used to move between renovation rooms without spreading dust through the house.
Although this option is more expensive than the others, the included poles create a small 'room' to contain dust and debris easily. It has four 12ft telescoping poles for easy installation, a magnetic zipper and carry bag for reuse or moving around the kit.
3. Don’t rely on air purifiers
Admittedly, we made this mistake fairly early on in our renovation journey. We have a humidity and damp issue so our dehumidifier is essential. We wrongly assumed the air purifying setting could be used to rid the air or dust.
‘Dehumidifiers and air purifiers should not be used to keep dust to a minimum during a home improvement project,' explains Chris Michael, director of Meaco . ‘In fact, mixing dehumidifiers and air purifiers with extreme levels of dust should be avoided at all costs. The dust will build up on the filter, get inside the dehumidifier and block the internal parts, damaging the dehumidifier and most likely rendering it not repairable.’
Learn from my mistake and keep your best air purifier and HVAC turned off during dusty renovation works.
4. Prepare an every-day cleaning routine
Despite work going on for weeks, we always made an effort to keep the rooms tidy for the next day. (Image credit: Amy Reeves)
Once your contractors have gone home for the day, make it good practice to give the site a quick clean. Get your hands on a spray bottle and fill it with water – I used this to wet the floor before sweeping to prevent the dust from becoming airborne and re-settling after cleaning.
Remove the majority of debris off the floor and surfaces before using a vacuum with a HEPA filter to remove the fine particles. Alternatively, invest in a wet-dry vac if you want to cut out sweeping and just suck up the larger bits of plaster alongside dust. Learn more about mopping vs wet vacuuming .
Take it from me, a regular vacuum does not like inhaling large chunks of drywall and you will need to replace it pretty fast. For surfaces, buy microfiber cloths in bulk and slightly wet them to wipe down. I bought in bulk similar to this microfiber multi pack from Walmart and they have been a godsend.
Amazon Basics 4 gallon, 3 HP Stainless Steel Wet/Dry Vacuum
Our wet/dry vacuum didn't just save me when it came to dust and plaster removal, it also prevented major water damage when a radiator pipe was accidentally punctured. Getting a good wet-dry vac is essential for any home improvement project in my eyes.
5. Deep clean once the job is complete
Once the giddy high of contractors leaving for good has calmed down, I give the entire house a thorough deep clean using these essential cleaning tips .
Even rooms far away from the one you’re renovating will have a layer of grime – no matter how hard you try. This process isn’t just practical, but it’s also fairly cathartic.
FAQs
How long does it take for dust to settle during a renovation?
Unfortunately, airborne dust particles can continue to settle long after construction has finished. Even five to six weeks post-renovation, you’ll find a layer of dusty debris on objects and surfaces around your home.
Does opening a window help reduce construction dust?
Yes, increasing ventilation during a renovation will reduce construction dust by bringing in fresh air. Even in the depths of winter at 23॰ Fahrenheit, we had our doors and windows open. Prepare to bundle up in five layers of sweaters – it is worth making this effort.
How can I protect soft furnishings from dust during a renovation?
Before construction starts, remove couches, cushions and any absorbent materials from the site. You can use specialist dust protection sheets to cover any furniture that you won’t be using, but keep in-use chairs and sofas away from the demolition zone and consider buying blankets as cozy covers to be removed at the end of the project.
Follow our guide to cleaning your couch for a pristine finish for your soft-furnishings.
Get updates delivered to you daily. Free and customizable.
It’s essential to note our commitment to transparency:
Our Terms of Use acknowledge that our services may not always be error-free, and our Community Standards emphasize our discretion in enforcing policies. As a platform hosting over 100,000 pieces of content published daily, we cannot pre-vet content, but we strive to foster a dynamic environment for free expression and robust discourse through safety guardrails of human and AI moderation.


 My pick
  Magnetic self-closing
  32.8 ft x 13.1 ft
 Good value
  Local News
Comments / 0